Support Center

Frequently asked questions and support documentation for RatingWidget.

Results

  • How can I add a price tag to my Shopify’s store Rich-Snippets?

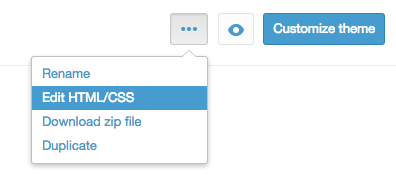
    It’s fairly very simple task. Open your product template liquid in the editor, and add the schema.org/Offer metadata:

    <div itemprop=”offers” itemscope itemtype=”http://schema.org/Offer”>

    <span itemprop=”price”>{{ product.variants.first.price | money }}</span>

    <meta itemprop=”priceCurrency” content=”{{ shop.currency }}” />

    <meta itemprop=”availability” content=”in_stock”/>

    </div>

  • How to show the ratings in Shopify Product Collection pages?

    By default, RatingWidget for Shopify app will show the ratings only on Product Pages. With some minor tweaks in you theme’s template, you can easily add the ratings to your Product Collections.

    • Open Shopify’s admin dashboard and go to Themes. There, click Edit HTML/CSS to open the template editor:
      Shopify Template Editor Button
    • In your editor, expand the Snippets directory and select rw-js.liquid.
      Now, simply change the first line of code:

      {% if template contains 'product' %}

      to this code:

      {% if template contains 'product' or template contains 'collection' %}

      This will load the ratings on product and products collection pages.

    • Now, to embed RatingWidget to your Collection pages, find the liquid file that is responsible for the collection template (the template file may have different names depending on the theme you are using, but usually it’s named collection.liquid). There, add the following ratings snippet exactly where you want the ratings to appear:
       {% include 'rw-rating' %} 

    Wasn’t that simple?! If you have no clue about coding or liquid files modification, feel free to contact us. Our Shopify experts would be happy to do it for you for a symbolic setup fee.

  • How to disable product voting for NON logged customers?

    If you want someone to log into their Shopify account before they can rate your products, simply follow these steps:

    • Log into your store’s Management Dashboard and open your Template’s Editor:
      Themes -> Customize theme -> Edit HTML/CSS.
    • There, find Snippets/rw-settings-custom.liquid and click it.
    • Add the following code:
      {% if customer %}{% else %}
          settings.options.readOnly = true;
      {% endif %}
      
    • Now Save the file and you done :)

    If you have no clue about coding or liquid files modification, feel free to contact us. Our Shopify experts would be happy to do it for you for a symbolic setup fee.

  • How to hide the content recommendations shown in the after vote report popup?

    To disable recommendations shown in the report popup, simply add this code snippet

    "hideRecommendations": true,

    to your existing integration code options. Your new integration code should be something like:

        ...
        options: {
           "hideRecommendations": true,
           "size": "medium",
           "style": "oxygen",
        }
        ...
    

    WordPress Plugin User?

    • Go to Dashboard > RatingWidget
    • Select the rating type tab you’d like to modify
    • Scroll to the bottom of the setting page until you get to the Power User Settings
    • Check the Activate / in-activate checkbox to activate the Power User Settings.
    • By default, the hideRecommendations option will already be there as one of the examples:
      options.hideRecommendations = true;
    • Delete all other preset functions if not needed or modify when necessary. Then click Save Changes and you’re all set!