Bottom line – we help to bring new potential customers to the store while Yotpo helps to close the deal by showing previous clients reviews (if positive). How we do that? We help the store to use the wisdom of the crowd, and collect an instant feedback using straight forward 5 star rating. Then, by leveraging the Rich-Snippets Premium feature, the ratings intelligently embedded into Google’s SERP to increase the CTR by up to 30%. More traffic = more sales!
Results
-
How is RatingWidget for Shopify different from Yotpo?
-
How can I add a price tag to my Shopify’s store Rich-Snippets?
It’s fairly very simple task. Open your product template liquid in the editor, and add the schema.org/Offer metadata:
<div itemprop=”offers” itemscope itemtype=”http://schema.org/Offer”>
<span itemprop=”price”>{{ product.variants.first.price | money }}</span>
<meta itemprop=”priceCurrency” content=”{{ shop.currency }}” />
<meta itemprop=”availability” content=”in_stock”/>
</div>
-
How RatingWidget’s Premium versions can increase my incoming search traffic?
RatingWidget will add a special Rich-Snippets that will add ratings right into your store’s Google SERP (Search Engine Results Page). This will make your SERP more attractive and eye-catching! The rich-snippets are designed to provide users a sense of what the webpage may include, and help them discover sites that are directly relevant to their searches, resulting in higher click-through rates. Ratings in SERP can help users to better identify pages with good products.

SERP Rich-Snippets
-
How RatingWidget can boost my Shopify store income?
It’s all about Social Proof, that’s the name of the game! Here are some studies that explains how the ratings can increase your products conversion rates:
- According to Google, 70% of Americans now say they look at product reviews before making a purchase.
- A CompUSA and iPerceptions study revealed that 63% of consumers indicate they are more likely to purchase from a site if it has product ratings and reviews.
- According to Harvard Business Review research, a 1-star increase in Yelp rating leads to 5-9% growth in sales.
Furthermore, once your SERP will include the ratings and your search incoming traffic will increase – your store will get more leads which means more potential customers.
-
How RatingWidget can reduce my store’s inventory expanses?
The beauty of the ratings is that they provide a simple way for your customers to share what they are thinking about your store’s products. By keeping track of your ratings’ Analytics and products purchasing history, you can easily detect your best and worst products. Next time you are purchasing products for your stock, simply buy more of your best sellers and less (or none) of your worst. That way you’ll save money by not buying an unwanted products to your stock.

-
How can I make sure that I’ve configured the ratings correctly on my Shopify’s store?
It’s super-easy. Just go to any of your products pages and check if you can see the rating widget.
-
How can I check that I’ve correctly configured the Rich-Snippets ratings for Google SERP?
Shopify: Copy the title of a product with a rating that already has at least one vote.
WordPress: Copy the title of a page or post with a rating that already has at least one vote.
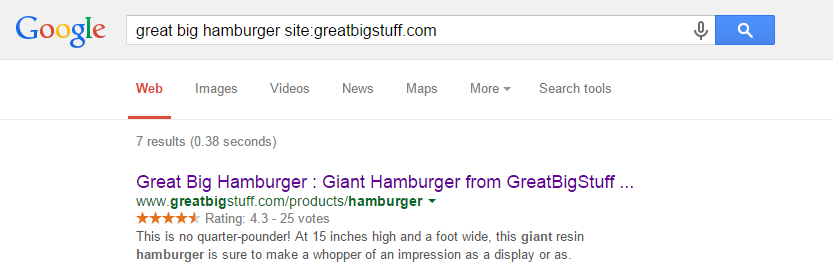
Query format: {{search_keywords}} site:{{site}}
Replace {{search_keywords}} with the title that you have just copied and replace {{site}} with your domain.
For example, if the product title is “great big hamburger” and the domain is “greatbigstuff.com”, the query should be:
great big hamburger site:greatbigstuff.com
Go to google.com and use the query format above, then search.
If you can see the ratings in the search result – the configuration is correct!
-
I’ve followed all the Rich-Snippets instructions but I don’t see any ratings on Google search results – what’s wrong?
The first thing you should do is to make sure that you’ve configured the ratings’ rich-snippets correctly. Go back to the this topic and follow the instructions. Once the configuration is right, usually it takes about two weeks until Google will add the Rich-Snippets ratings. It’s really varies according your store’s content quality, crawling frequency, pagerank and many other parameters. Even though we have many clients that the ratings appeared on their SERP, we can’t assure that Google will eventually add the ratings’ rich-snippets. Unfortunately we don’t have an access to their algorithms.
-
What shall I do if I plan to change my Shopify theme?
First of all – go and change your theme, customize it to make it look beautiful. Once you’ve changed the theme, all you need to do is go to Embed the Code and follow the instructions – it’s the exact same process that you’ve already done after adding the app.
-
Will I loose the ratings data after I change my Shopify’s store theme?
No need to worry! Your data is secure & safe. It’s directly related to your store and products. So after you’ll Embed the Code to the new theme, all the ratings will immediately get back with as they used to.
-
I’ve changed my Shopify’s store theme and now I can’t see the ratings, should I panic?
Relax! no need to panic, your ratings are totally safe & secure. Just read this, and your ratings will be back.
-
How to show the ratings in Shopify Product Collection pages?
By default, RatingWidget for Shopify app will show the ratings only on Product Pages. With some minor tweaks in you theme’s template, you can easily add the ratings to your Product Collections.
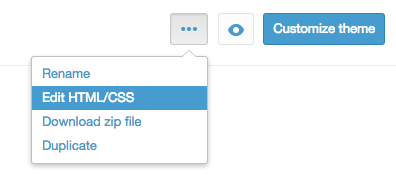
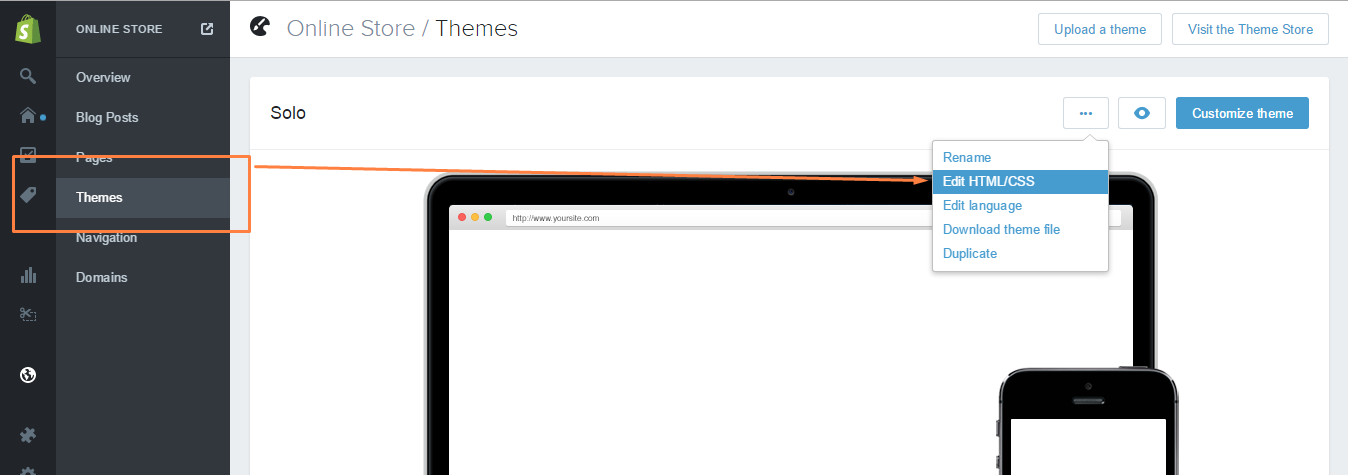
- Open Shopify’s admin dashboard and go to Themes. There, click Edit HTML/CSS to open the template editor:
- In your editor, expand the Snippets directory and select
rw-js.liquid.
Now, simply change the first line of code:{% if template contains 'product' %}to this code:
{% if template contains 'product' or template contains 'collection' %}This will load the ratings on product and products collection pages.
- Now, to embed RatingWidget to your Collection pages, find the liquid file that is responsible for the collection template (the template file may have different names depending on the theme you are using, but usually it’s named
collection.liquid). There, add the following ratings snippet exactly where you want the ratings to appear:{% include 'rw-rating' %}
Wasn’t that simple?! If you have no clue about coding or liquid files modification, feel free to contact us. Our Shopify experts would be happy to do it for you for a symbolic setup fee.
- Open Shopify’s admin dashboard and go to Themes. There, click Edit HTML/CSS to open the template editor:
-
How to disable product voting for NON logged customers?
If you want someone to log into their Shopify account before they can rate your products, simply follow these steps:
- Log into your store’s Management Dashboard and open your Template’s Editor:
Themes -> Customize theme -> Edit HTML/CSS. - There, find
Snippets/rw-settings-custom.liquidand click it. - Add the following code:
{% if customer %}{% else %} settings.options.readOnly = true; {% endif %} - Now Save the file and you done

If you have no clue about coding or liquid files modification, feel free to contact us. Our Shopify experts would be happy to do it for you for a symbolic setup fee.
- Log into your store’s Management Dashboard and open your Template’s Editor:
-
I uninstalled RatingWidget for Shopify app but the ratings are still on my product pages. How to completely remove the ratings?
1. Go to your Store Admin Dashboard.
2. There, click Online Store menu, then click Themes, then click on Edit HTML/CSS.
3. Open Layout/theme.liquid, search for
{% include 'rw-js' %}and remove it. It can usually be found immediately before the</body>tag.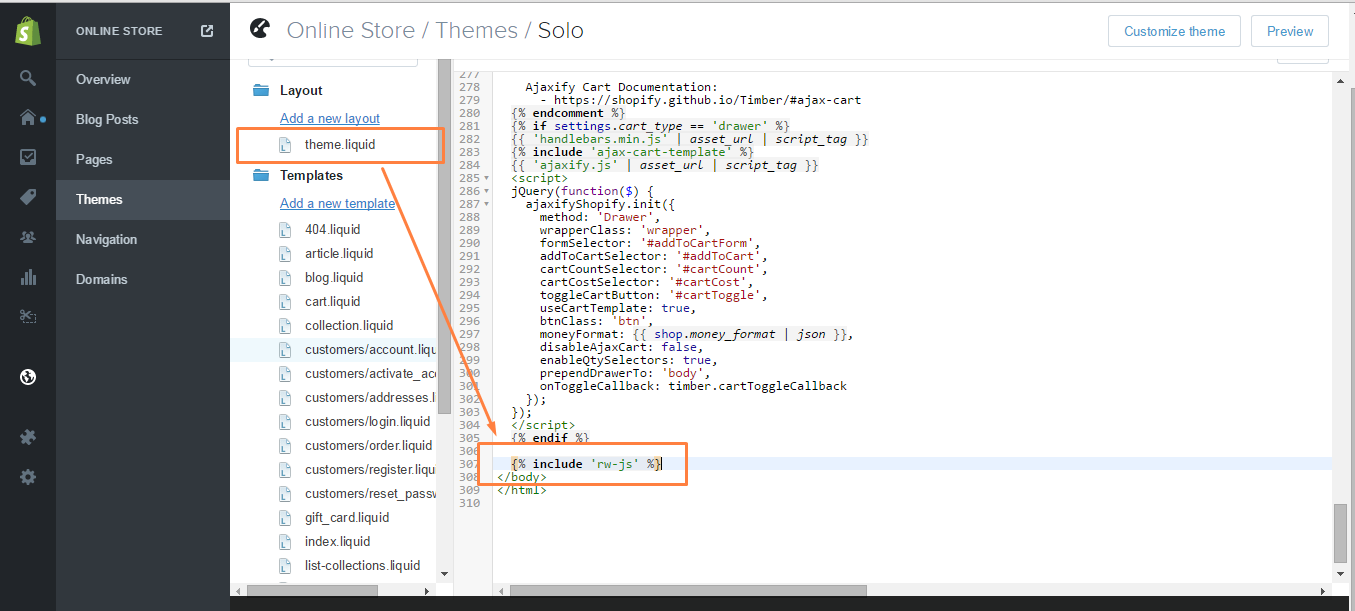
4. Save the changes.
-
How to hide the content recommendations shown in the after vote report popup?
-
-
by RatingWidget
To disable recommendations shown in the report popup, simply add this code snippet
"hideRecommendations": true,
to your existing integration code options. Your new integration code should be something like:
    ...
    options: {
       "hideRecommendations": true,
       "size": "medium",
       "style": "oxygen",
    }
    ...
WordPress Plugin User?
- Go to Dashboard > RatingWidget
- Select the rating type tab you’d like to modify
- Scroll to the bottom of the setting page until you get to the Power User Settings
- Check the Activate / in-activate checkbox to activate the Power User Settings.
- By default, the
hideRecommendationsoption will already be there as one of the examples:options.hideRecommendations = true;
- Delete all other preset functions if not needed or modify when necessary. Then click Save Changes and you’re all set!